TypeScript 에서 API 호출하기 - fetch
2024. 4. 7. 22:54
728x90
반응형
TypeScript 에서 API 호출하기 - fetch
먼저 이전 시간의 TypeScript 포스팅을 기반으로 테스트가 진행되었습니다.
2024.04.06 - [코딩] - TypeScript API 서버 만들기
TypeScript에서 fetch 를 이용해 API 를 호출하는 방법입니다.
1. C# API 구성
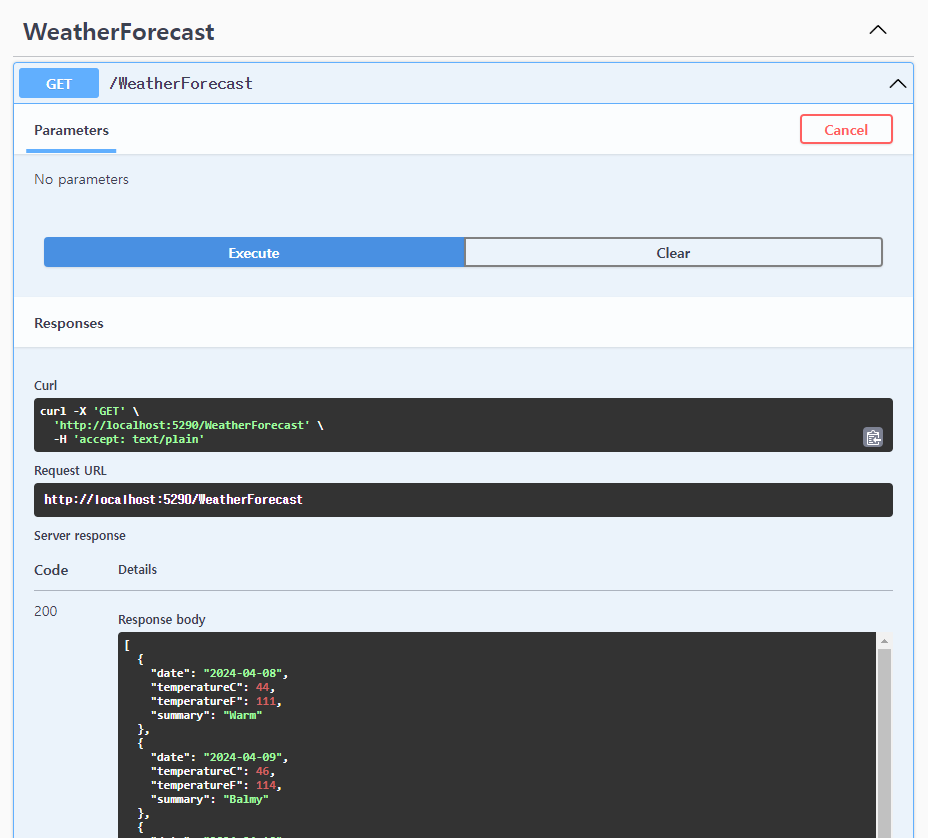
API는 C# 에서 ASP.NET Core 웹 API 프로젝트를 만들면
샘플 예제로 생성되는 GetWeatherForecast API 를 호출해 봅니다.
아래는 C# API 코드입니다.
using Microsoft.AspNetCore.Mvc;

namespace TestApi.Controllers
{
    [ApiController]
    [Route("[controller]")]
    public class WeatherForecastController : ControllerBase
    {
        private static readonly string[] Summaries = new[]
        {
            "Freezing", "Bracing", "Chilly", "Cool", "Mild", "Warm", "Balmy", "Hot", "Sweltering", "Scorching"
        };

        private readonly ILogger<WeatherForecastController> _logger;

        public WeatherForecastController(ILogger<WeatherForecastController> logger)
        {
            _logger = logger;
        }

        [HttpGet(Name = "GetWeatherForecast")]
        public IEnumerable<WeatherForecast> Get()
        {
            this._logger.Log(LogLevel.Information, "GetWeatherForecast!!" + DateTime.Now);

            return Enumerable.Range(1, 5).Select(index => new WeatherForecast
            {
                Date = DateOnly.FromDateTime(DateTime.Now.AddDays(index)),
                TemperatureC = Random.Shared.Next(-20, 55),
                Summary = Summaries[Random.Shared.Next(Summaries.Length)]
            })
            .ToArray();
        }
    }
}
namespace TestApi
{
public class WeatherForecast
{
public DateOnly Date { get; set; }
public int TemperatureC { get; set; }
public int TemperatureF => 32 + (int)(TemperatureC / 0.5556);
public string? Summary { get; set; }
}
}Swagger
2. TypeScript 에서 API 호출
TypeScript 에서 WeatherForecase 구조를 정의합니다.
type WeatherForecast = {
  summary: string;
  temperatureC: number;
  date : Date;
}
function 에서 아래와 같이 fecth 를 이용해 api 를 호출합니다.
async function fetchWeatherForecasts() : Promise<WeatherForecast[]> {

  const response = await fetch('http://localhost:5290/WeatherForecast');

  if (!response.ok) {
        throw new Error(`HTTP error! status: ${response.status}`);
  }

  const forecasts: WeatherForecast[] = await response.json();
  console.log(forecasts);

  return forecasts;
}
위 코드를 보면 알수 있듯이 fetch 에 호출할 API 주소를 넣고 response.json() 을 이용해 정의한 객체로 변환합니다.
위 function 을 호출하여 log 에 찍힌 내용입니다.

저는 이전 포스팅에서 테스트를 하여 API 를 만들어 C# API 호출 테스트를 진행했습니다.
테스트한 TypeScript 전체 코드입니다.
import express, { Request, Response } from "express";

const port = 6010;

const app = express();
app.use(express.raw({ type: 'application/octet-stream' }));

type WeatherForecast = {
  summary: string;
  temperatureC: number;
  date : Date;
}

app.get("/getFetch", (req: Request, res: Response) => {
  console.log("getFetch!!");
  fetchWeatherForecasts().then(data =>
    res.send(data)
  );
});

async function fetchWeatherForecasts() : Promise<WeatherForecast[]> {

  const response = await fetch('http://localhost:5290/WeatherForecast');

  if (!response.ok) {
        throw new Error(`HTTP error! status: ${response.status}`);
  }

  const forecasts: WeatherForecast[] = await response.json();
  console.log(forecasts);

  return forecasts;
}

app.listen(port, () =>
{
    console.log(`Server is running on http://localhost:${port}`);
});
결과 확인

728x90
'코딩' 카테고리의 다른 글
| Grafana 에 json 템플릿 대시보드 import 하기 (0) | 2024.04.24 |
|---|---|
| Grafana 대시보드에 Metric 표시하기 (0) | 2024.04.24 |
| TypeScript API 서버 만들기 (0) | 2024.04.06 |
| TypeScript 에서 tsc.ps1 파일을 로드할 수 없습니다 오류 해결방법 (0) | 2024.04.03 |
| Cron 표현식 (0) | 2024.02.29 |